Create a VFX Toggle Device with Verse | Tutorial Guide
 PRO | DRAGON 🐉
CREATE A VFX TOGGLE DEVICE WITH VERSE | TUTORIAL GUIDE
Since UEFN launched, my nose has been deep in Verse documentation. And boy, have I learned so much! If you are new to coding like I am, it may have seemed overwhelming at first glance. On the other hand, I dabbled - a bit - in Unreal Engine to get a feel for what was to come! The only thing I can say is that - Blueprints are much different from Verse. With that discovery, I knew I was in for an adventure. And a worthy one at that!
If you read my previous post about Verse Expressions, you will be ready for this tutorial! If you have not I suggest you check it out before continuing below.
View the post here:
UEFN VERSE LANGUAGE: UNDERSTANDING EXPRESSIONS
WHY MAKE VERSE DEVICES?
So you may wonder? Why make Verse devices in the first place?
And that's a reasonable thought! Especially when coming into this without coding knowledge. If that thought crossed your mind, don't worry!
I thought the same as well! So it's time to share what I found!
Verse Devices allow you to
• Create multiple instances within a single script
• Create unique user experiences that reflect your creativity
• Create complex scripts that synchronize instances simultaneously.
• Create user interfaces with interactable buttons
• Create games you couldn't have with regular FNC devices
That's just a few, but I'm sure there are more!
Now that you know why you should make a Verse device, let's start coding one!
CREATING A VFX TOGGLE DEVICE
CREATE YOUR PROJECT
To start, you need to create an island. Choose any island template you like and start your project.
CREATE VERSE DEVICE
Once your project is open and ready, click on Verse, which you will find on the right-hand side of Tools. Look for Verse Explorer in the drop down menu and click on that.
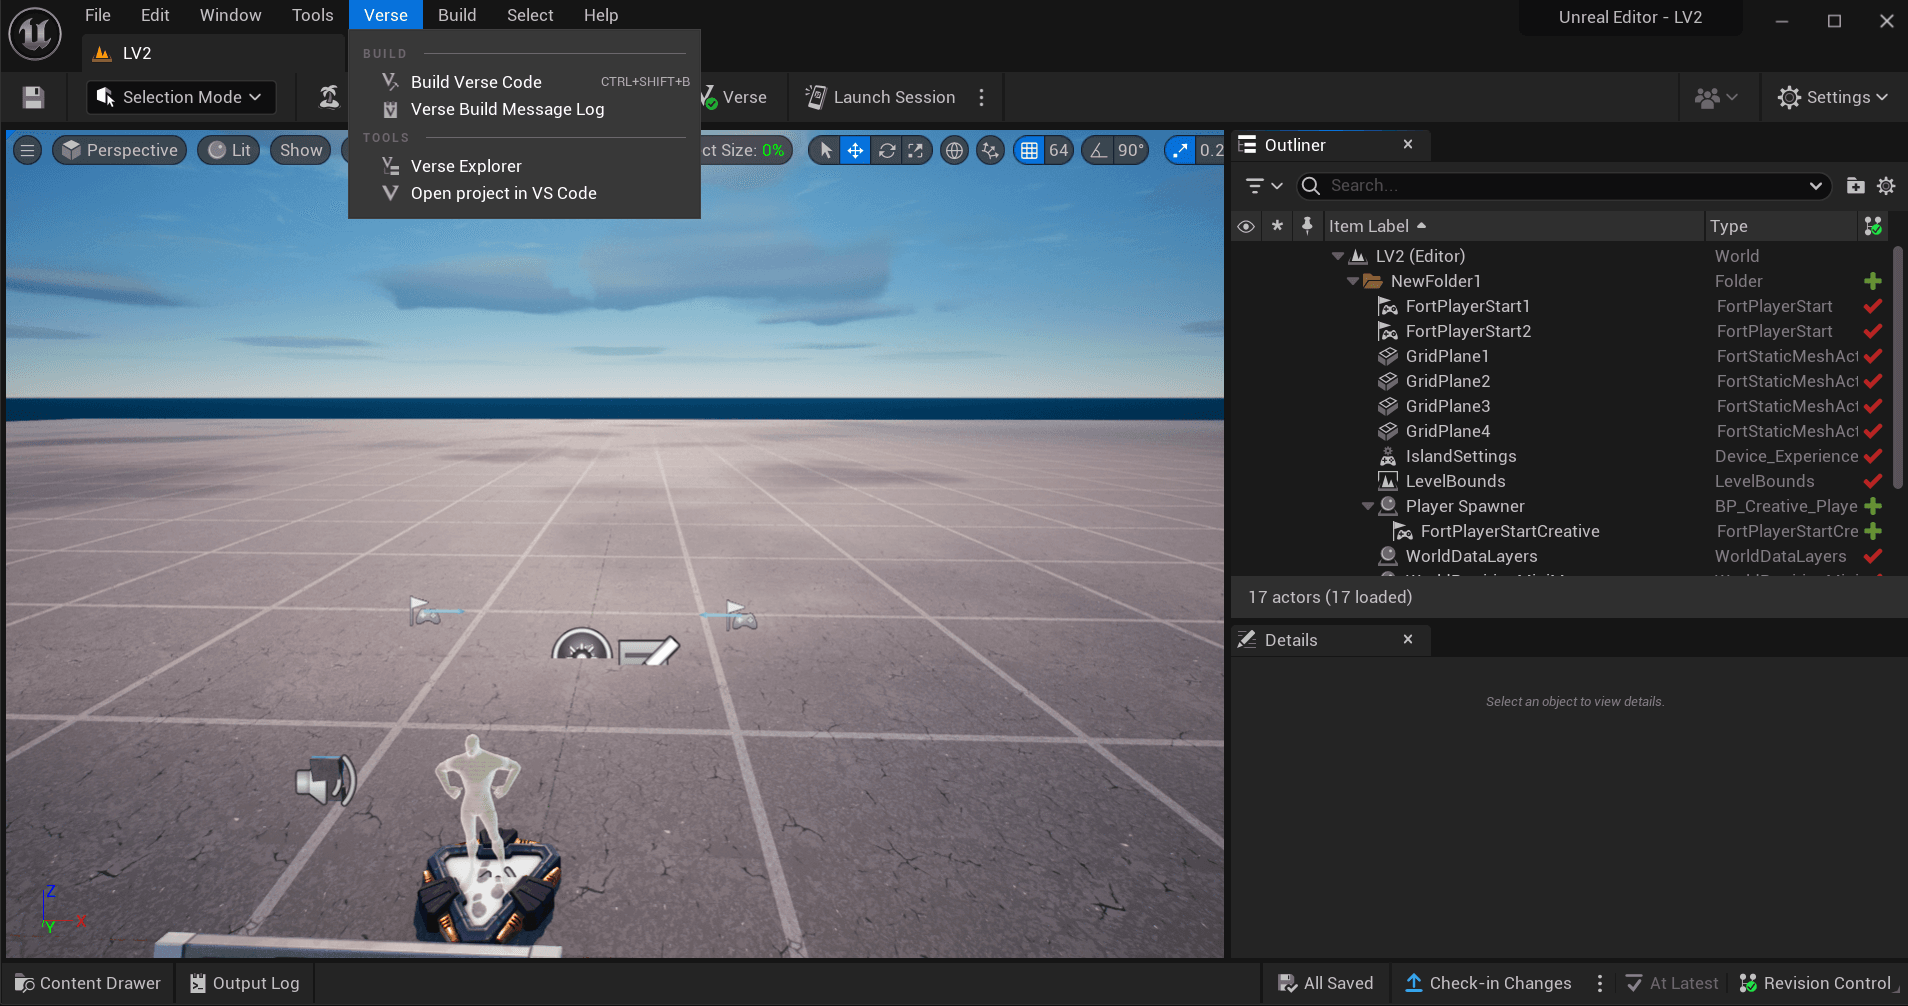
Right click on the top folder, which should be the name of your project so that another drop-down menu appears. Look for - Add new Verse file to project and click on that to create one.
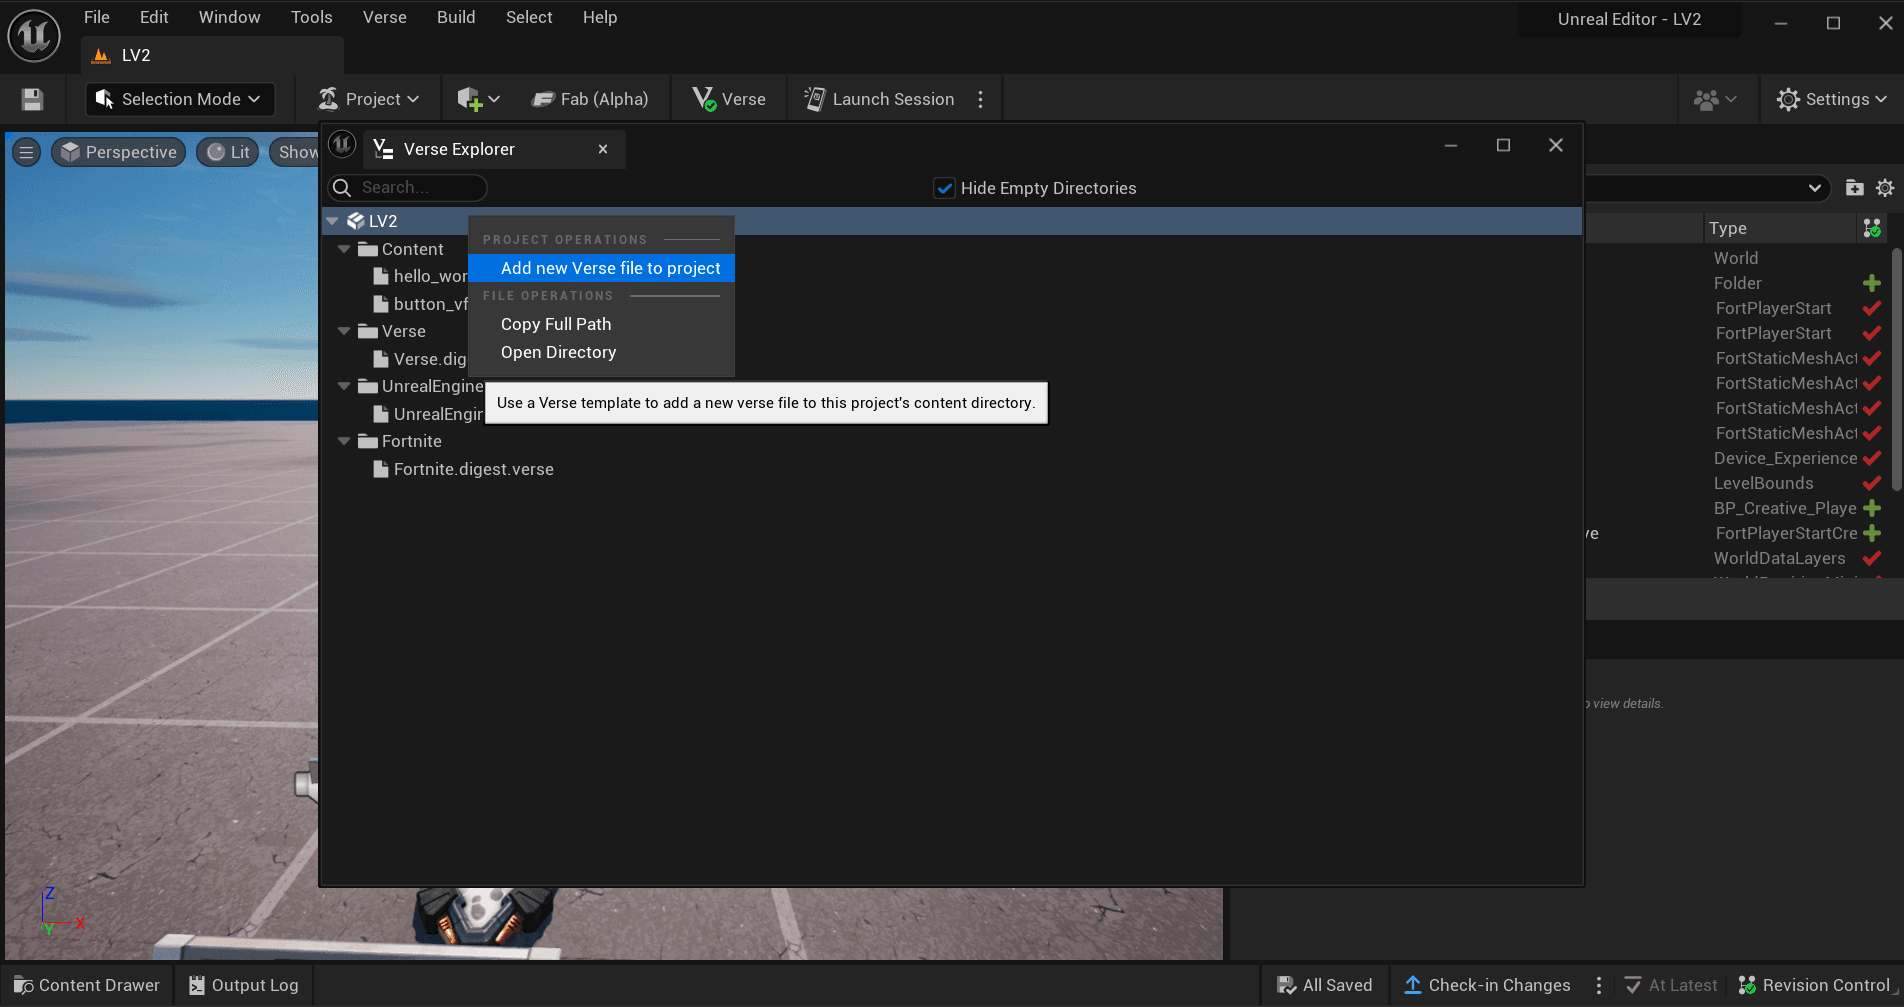
You will see a pop up appear that asks you to choose a template. At this time, there's only one template to choose from. You will see that it is highlighted blue. On the right hand side you will see: Device Name - in which you can name your device anything you like.
For this tutorial, we will call it : button_vfx_device. You will notice a window that states Preview. In this window you will see what the base template of your device will look like.
Go ahead and click: Create.
When it finishes loading, you will notice the device has been added to the hierarchy under your Project Folder. It will have a green plus sign next to it. Once you see this exit out the window by clicking the [x] in the top right hand corner of the window.
BUILD VERSE CODE
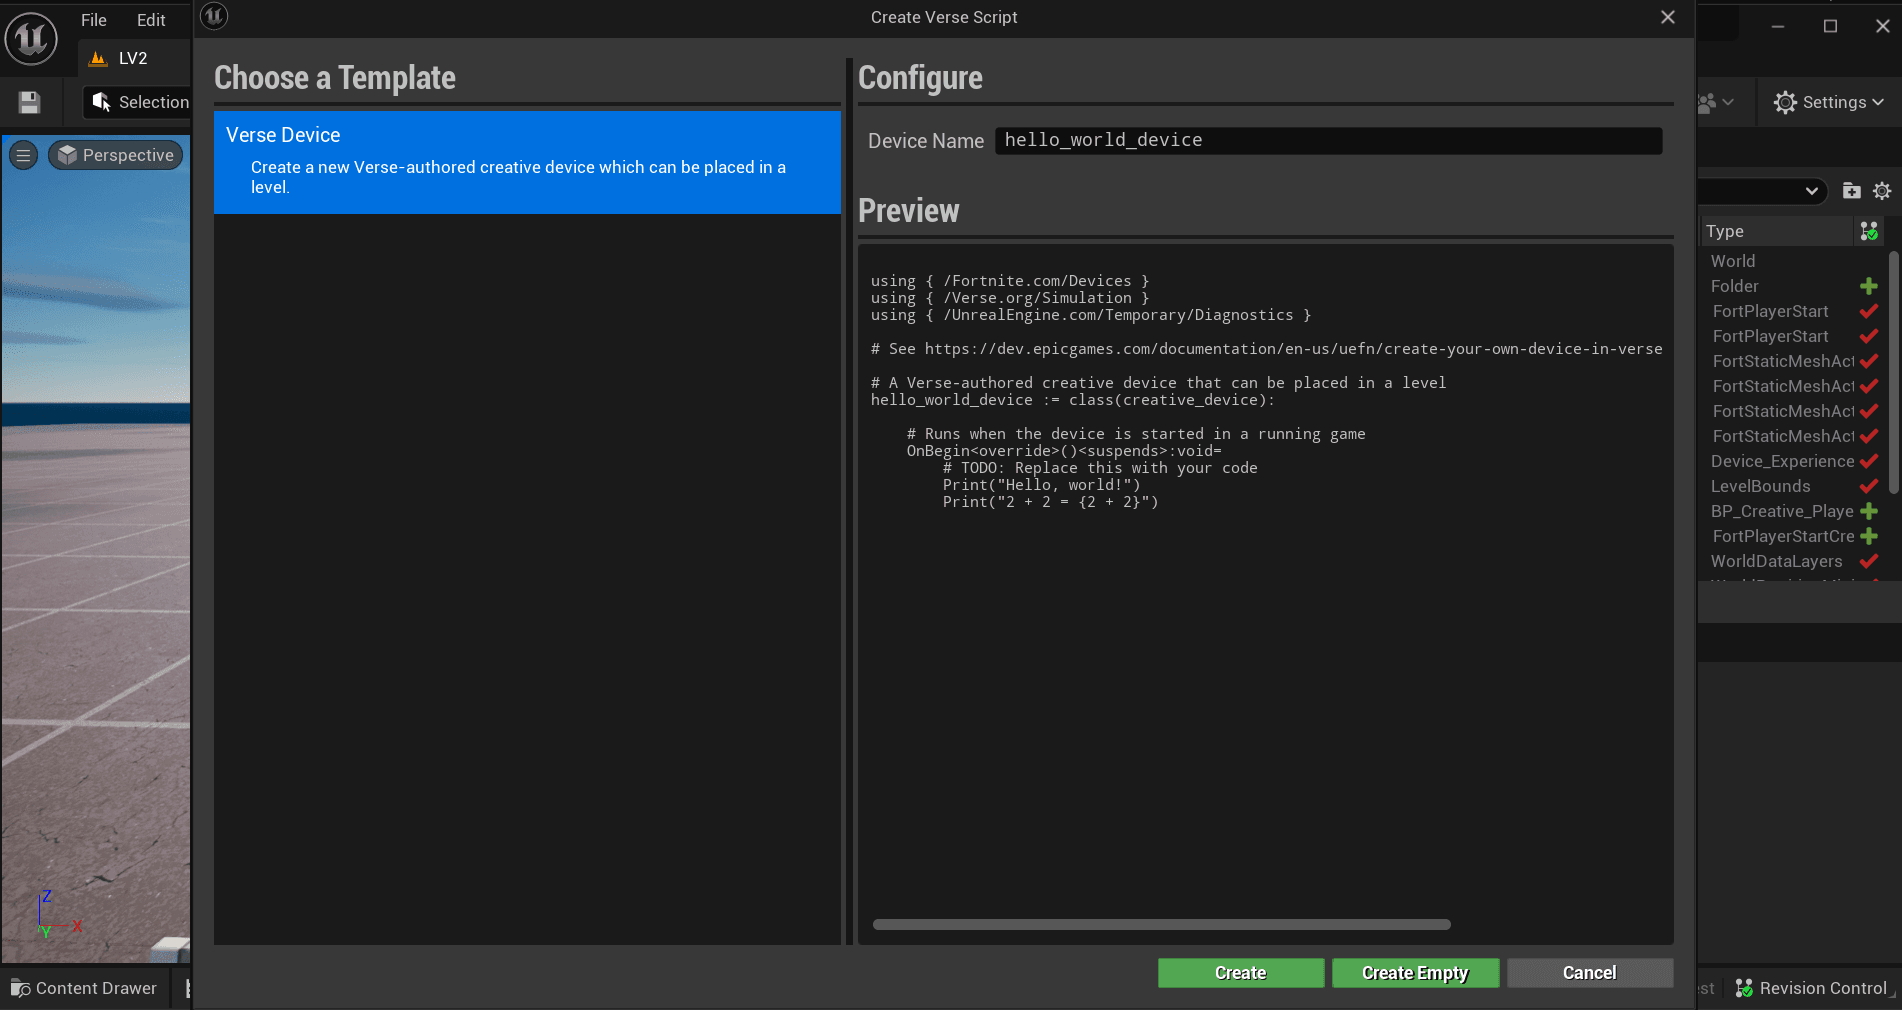
In order for your device to appear in the Content Drawer, you must first build the Verse code. To do this, click back on Verse, which is on the right hand side of Tools, and then click Build Verse Code.
ADD THE DEVICES TO YOUR MAP
Next go to Content Drawer and go to your project name folder, which is usually locate right underneath the one that says All. Look for a folder called Creative Devices and open it. You should see the device you have created there. Click it and drag it onto your map. Please note - if you skip this step, the code will not run when you launch a game. The device must be present in your map!
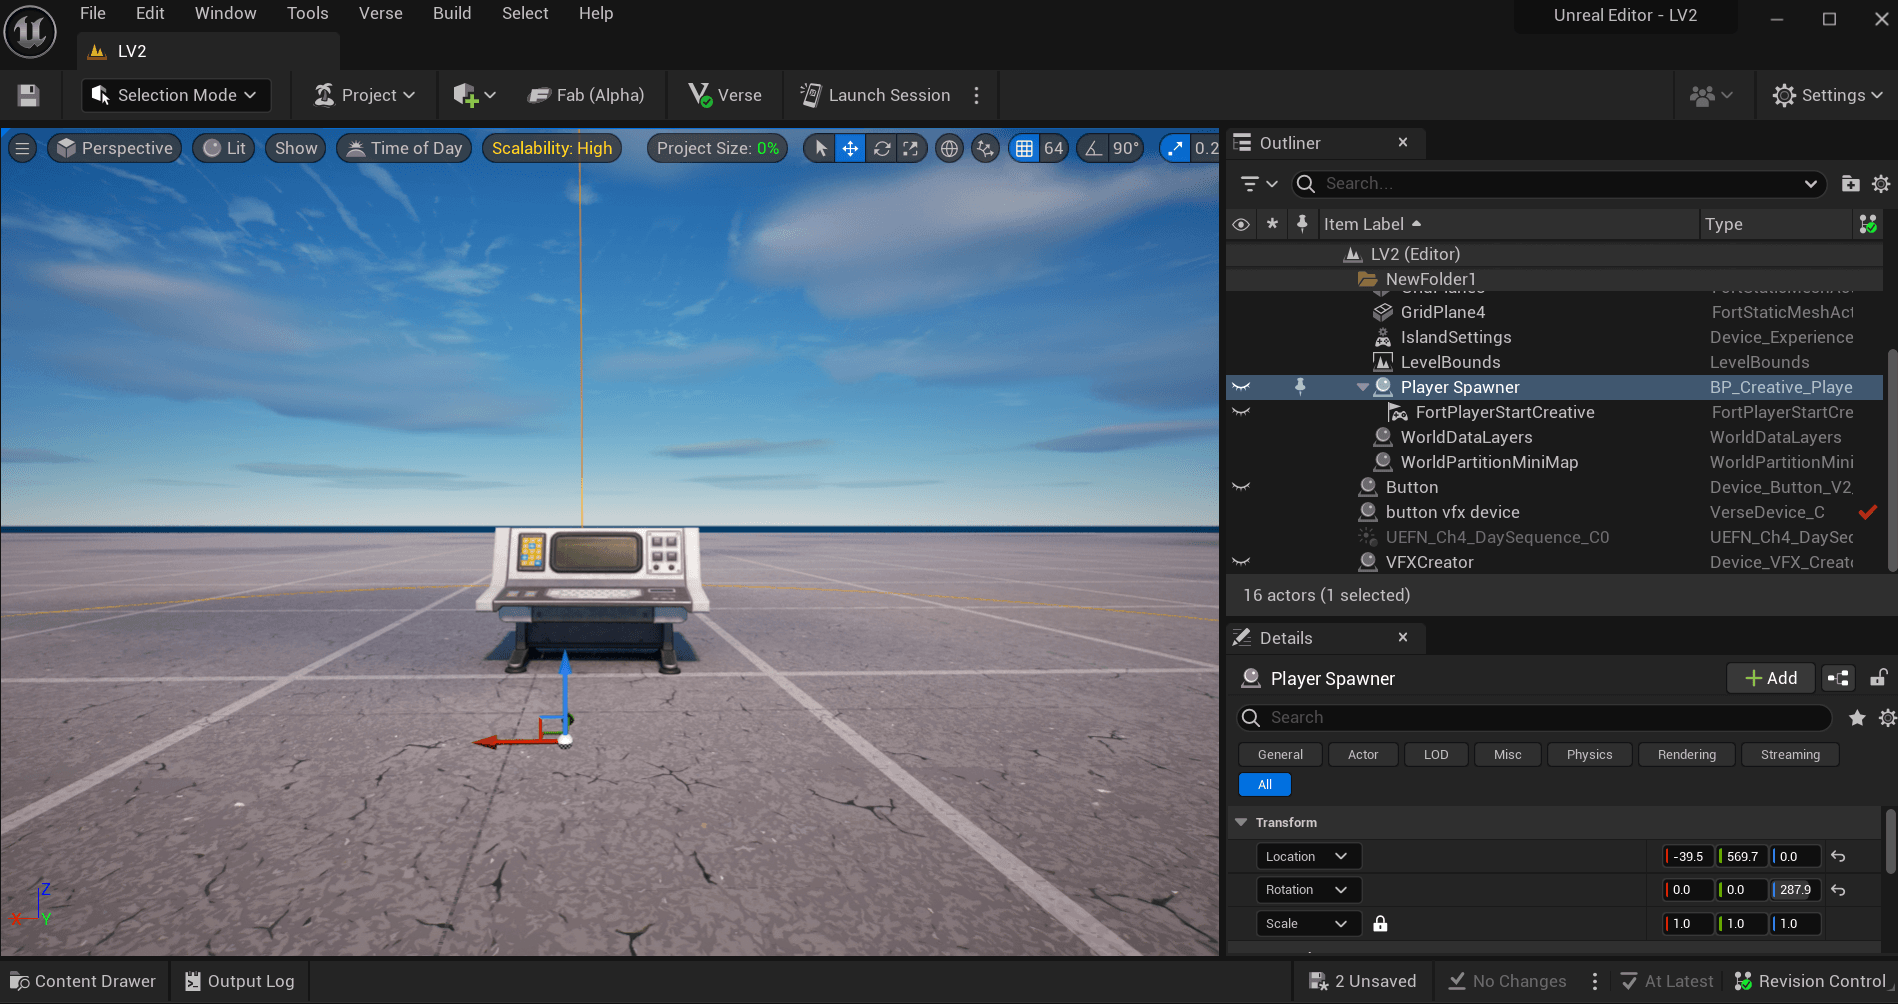
Now that you have added the Verse Device to your map, let's add the remainder of the devices we will need for the set-up! Go back to Content Drawer and click on the folder called: Fortnite. In the search bar, search for these items and drop them on your map - Player Spawn Pad, Button Device, VFX Creator. Since we have all the devices needed to start coding, let's dive into Verse!
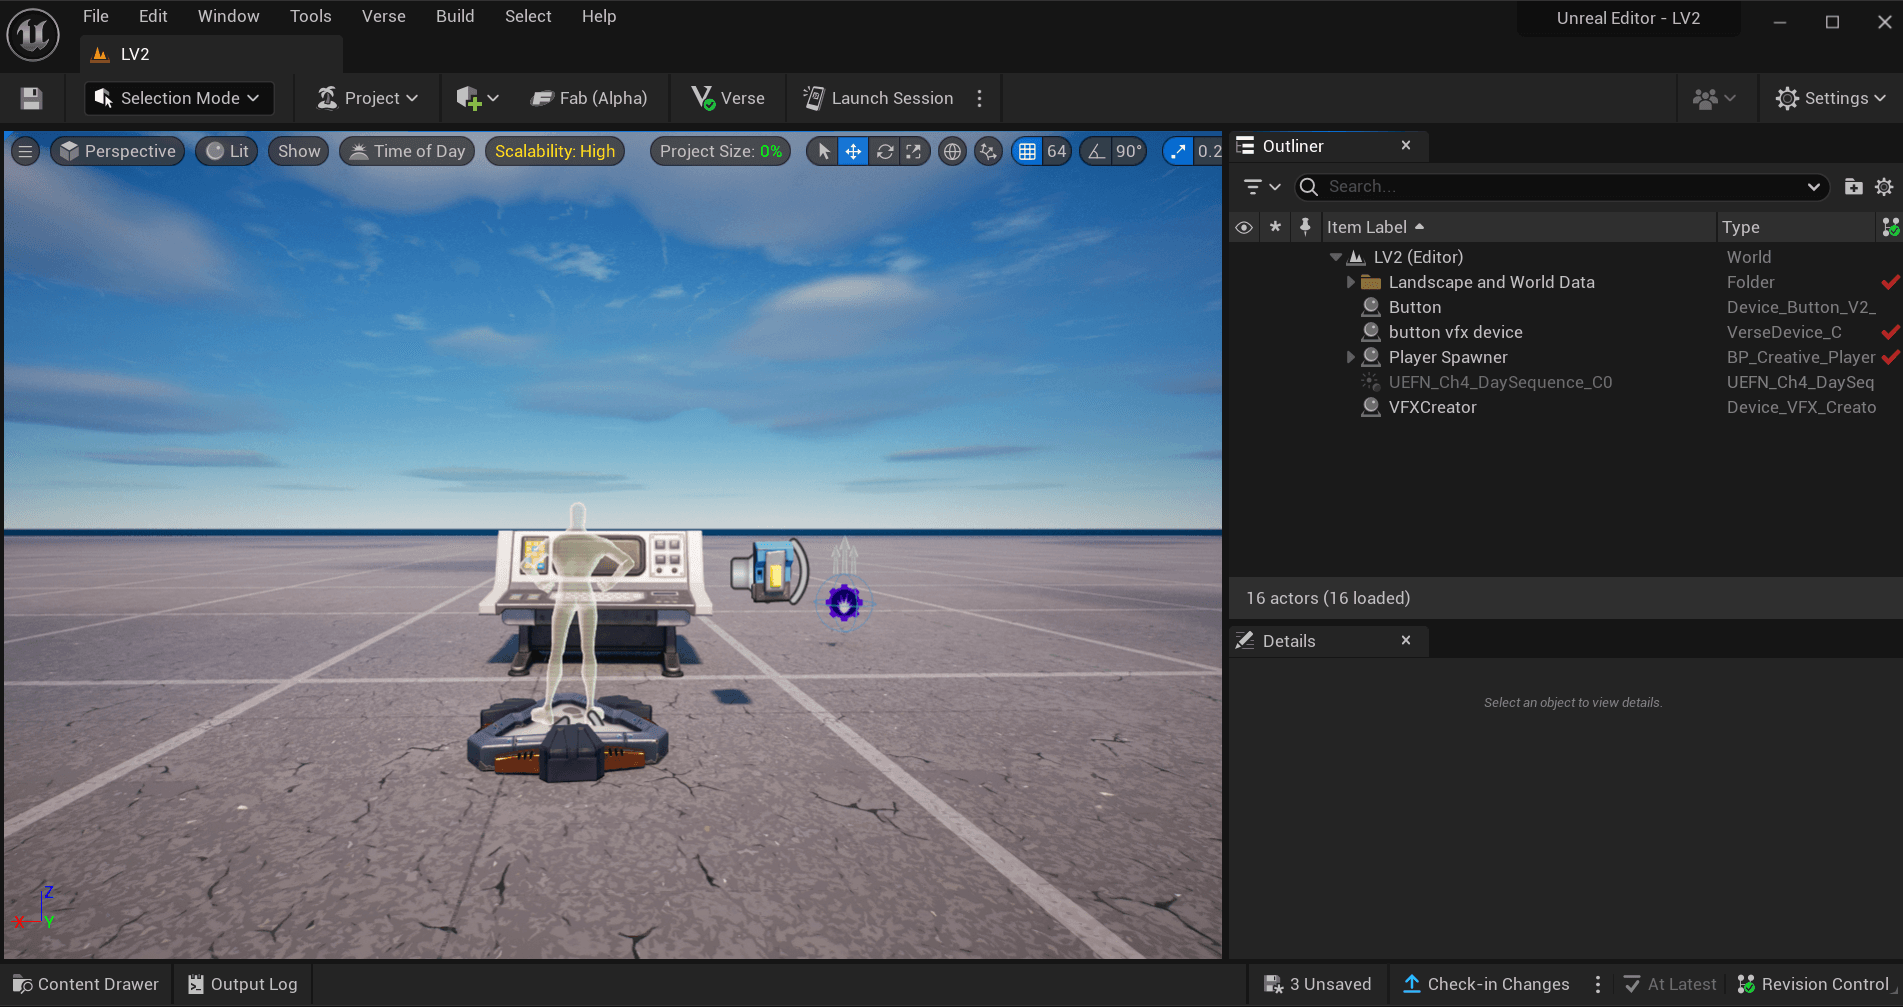
STARTING VERSE
Start Verse by clicking on the the button labeled : Verse - that has a green check mark next to it. You will find it between the Fab (Alpha) and Launch Session Button. Once it loads you will see a window to your left that states Explorer. Here you will find all the Verse devices in your map, plus additional scripts you should not alter for this project.
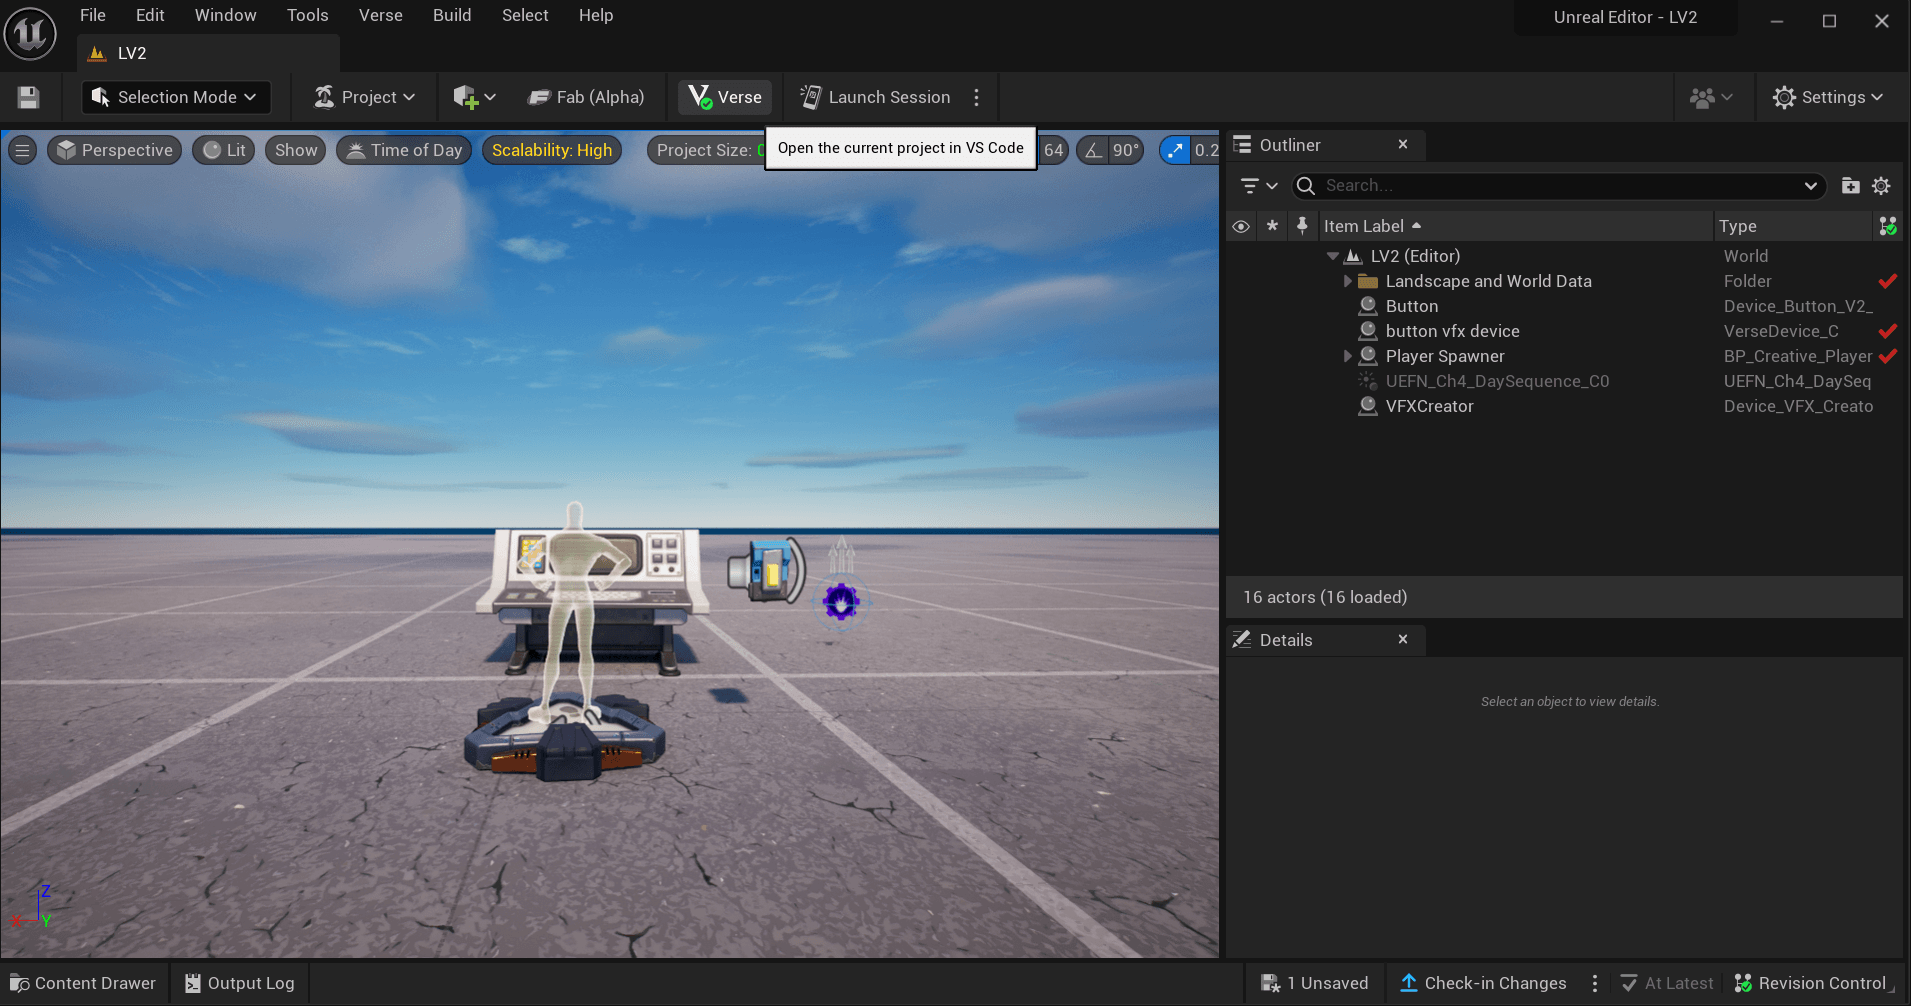
Make sure - button_vfx_device.verse - is selected and highlighted blue. On the left hand side you will see, what I call, your coding window- which is the area where you will create your code.
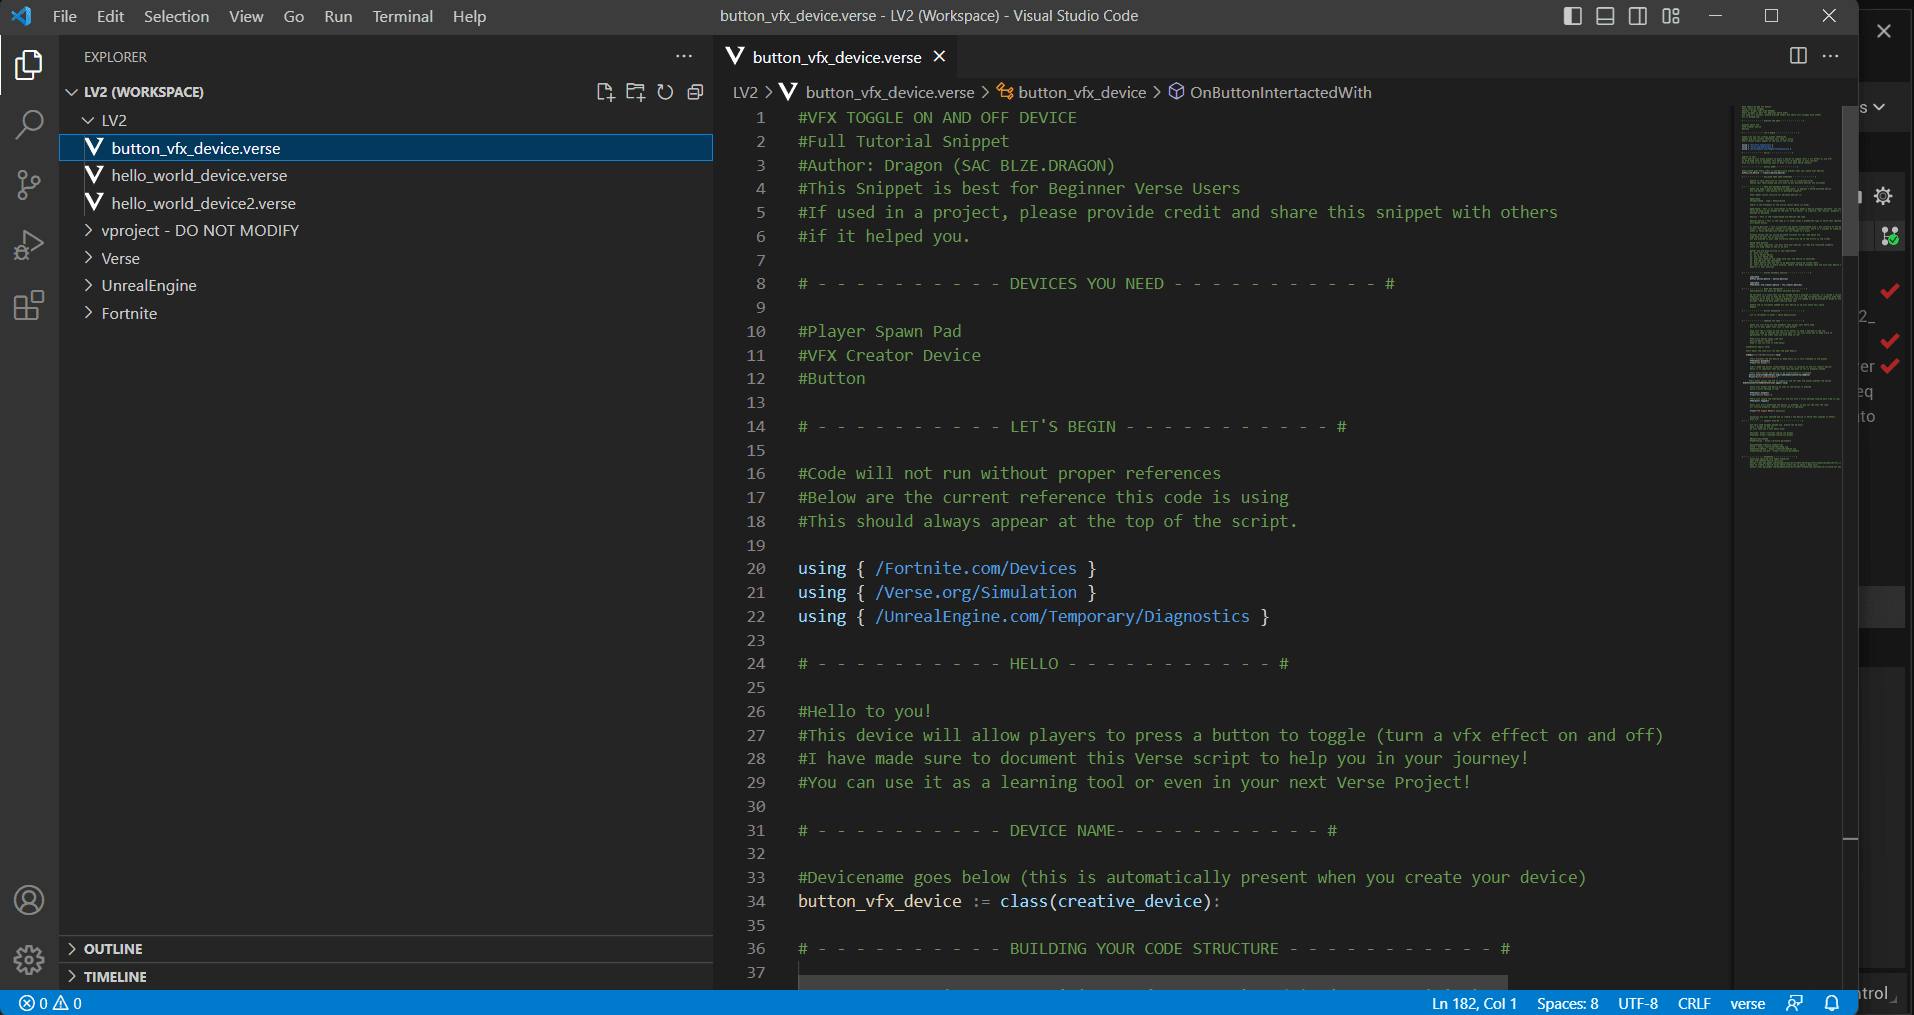
You will see that my coding area is already filled up. That's because this tutorial is derived from the snippet I published in the Epic Developer Community. So going forward, feel free to use it as a guide for you to follow along!
Copy the free tutorial snippet here:
(be sure to drop a thumb to support the work, if you do you are awesome!)
https://dev.epicgames.com/community/snippets/ekv/fortnite-vfx-toggle-device
BUILDING YOUR CODE STRUCTURE
If you copied the snippet, paste it into your code window and follow along. We will start by building your code structure. When learning Verse, I have come to find that Verse is very sensitive to structure and case sensitive. That means that if you place a line in the wrong place or do not use proper spacing, you will get an error. If you set a property name, then later use the wrong casing, it will display an error. For example, if you set your property name to be BUTTON, then when initializing that property and referring back to it, you spell it as button instead, you will get an error due to the incorrect case being applied. So try to be exact when naming your devices.
An excellent practice is to name your initial Fortnite Device the same as your property name. This will make it easier to build your code.
EDITABLE DEVICES or DEVICE REFERENCES
Now let's write some code! Beneath your Verse Device name you can list your Editable Devices. Editable Devices expose a Verse-authored device to the editor, making it an editable property! This means that you will be able to bind those devices to the devices you have dropped on your map (the ones that appear in your Outliner). I realized that this is similar to what we were doing with Event Binding! Which was pretty cool! When you bind your device this way, any code within the script code will run on that device when you run the game!
Type this code in the area beneath your device name (as shown in the snippet).
@editable
Button:button_device = button_device{}
This code tells Verse that you want to make the button device editable. By the way, let me break down what this means.
The common syntax structure for editable devices is:
@editable
PropertyName:type = DefaultValue
BREAKDOWN
• Button This is the PropertyName and defines the type.
• button_device This is the type or in other words a predefined type in Verse that represents a clickable button.
• = button_device{} This initializes the button PropertyName with a new instance of the button_device #class. The curly braces create an archetype instantiation, which is a process of creating an instance or class #that is fully defined with values for its fields in a class.
MAKE THE VFX DEVICE EDITABLE
Now let's add the next editable device that we dropped on the map which is the VFXCreator Device. Type this editable device code underneath the button code. (Just like the example in the snippet)
@editable Button:button_device = button_device{}@editable VFXCreator:vfx_creator_device = vfx_creator_device{}
BIND YOUR DEVICES
Now that you have typed in your editables it's time to bind your devices. The most appropriate way to describe this process is event binding. So let's go ahead and try it!
1. Save your Verse File
2. Return back to the Unreal Editor
3. Run your Verse code
4. View your Details tab (make sure your new Verse device is selected)
5. And see your new editable devices!
6. Every device that you set to be @editable should be listed
7. Just like event binding, select the empty dropdown menu and bind your editable device to the device in your outliner.
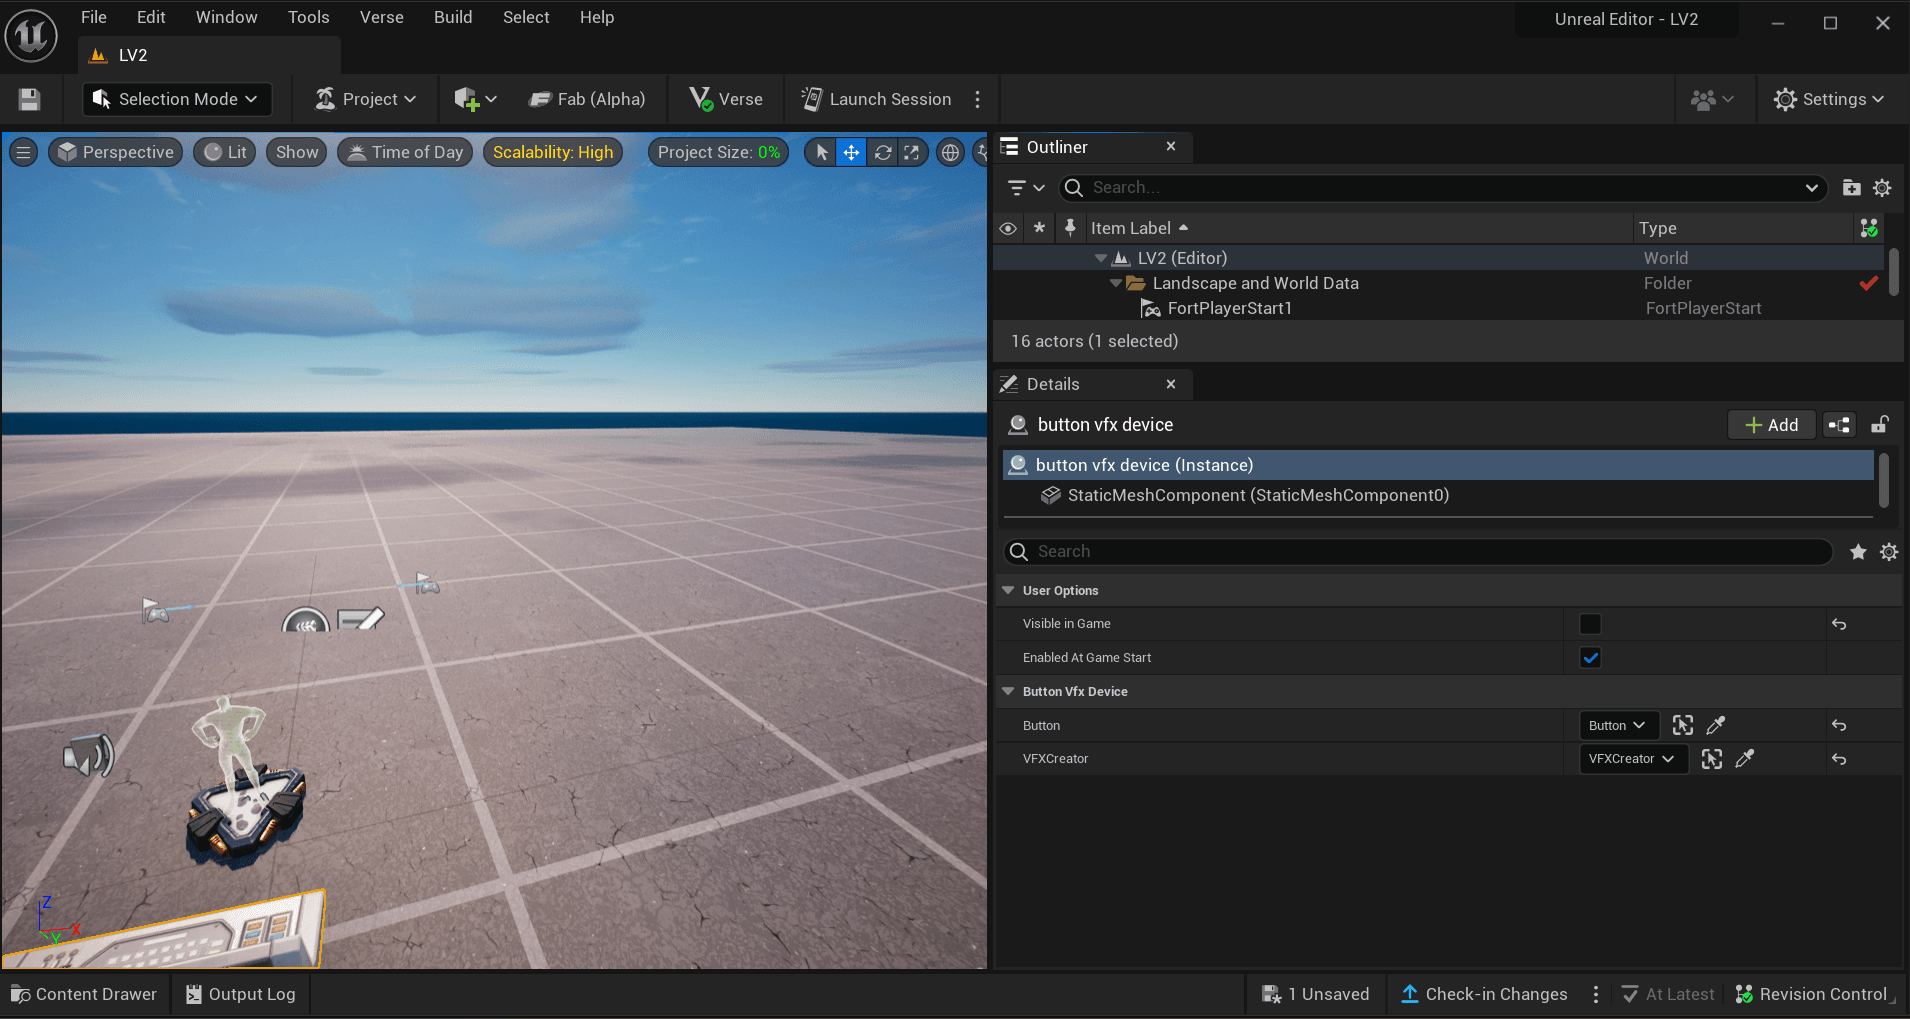
Now save your entire project! Great! Everything should be linked up now and ready to go! You can if you want to, name your button and update additional settings (like color, etc) in the Fortnite Device details tab for the VFXCreator too. If you do this be sure to save all your progress!
Once you are done with this, it's time to return to Verse to finish the project!
ADDING THE CODE - REACTING TO DEVICE EVENTS The next section of code you enter allows your devices to react to device events that you set. This will be placed underneath the OnBegin Function which looks like
OnBegin<override>()<suspends>:void=
Now the VFX Device will be enabled at game start, but to prevent that let's Disable it with this code:
VFXCreator.Disable()
To better understand what's going on here, let's breakdown the code structure.
VFXCreator - PropertyName - In fact, it is the same property name used when creating your editable device.
.Disable - is the function.
()- Parentheses are used for setting parameters in a function signature and arguments in a function call, and for grouping expressions, tuples, and subclasses.
MAKE THE BUTTON INTER-ACTABLE
Next, let's make the button inter-actable! Beneath the VFX code we just added, let's type in:
Button.InteractedWithEvent.Subscribe(OnButtonIntertactedWith)
Now that the button can be pressed, its time to set it to do something when it is pressed. To do this, type the code:
OnButtonIntertactedWith(InPlayer:agent):void=
This means that when the player interacts with the button, an event will take place. So any event you add underneath this line will be associated every-time the player interacts with the button. What we are going to do here is enable the VFX device when the button is pressed, then set it to toggle.
To do this you will use this code:
VFXCreator.Enable() Print("Button Ready!")VFXCreator.Toggle() Print("VFX Toggle Ready")
The Print Syntax even though optional, is good to use. Since Verse code runs in order, it allows you to track what is going on in your log when you run a game test.
Once you have typed all that in, you can save your Verse file, then build the code. When you see a green check mark, that means you ar good to go and your code is ready to be tested!
To test everything you have done, launch a session and start a game!
AND YOU ARE DONE!
Congratulations on building your first Verse device!
The more you practice, the easier it will become! With more knowledge, you can create
code with more complexity!
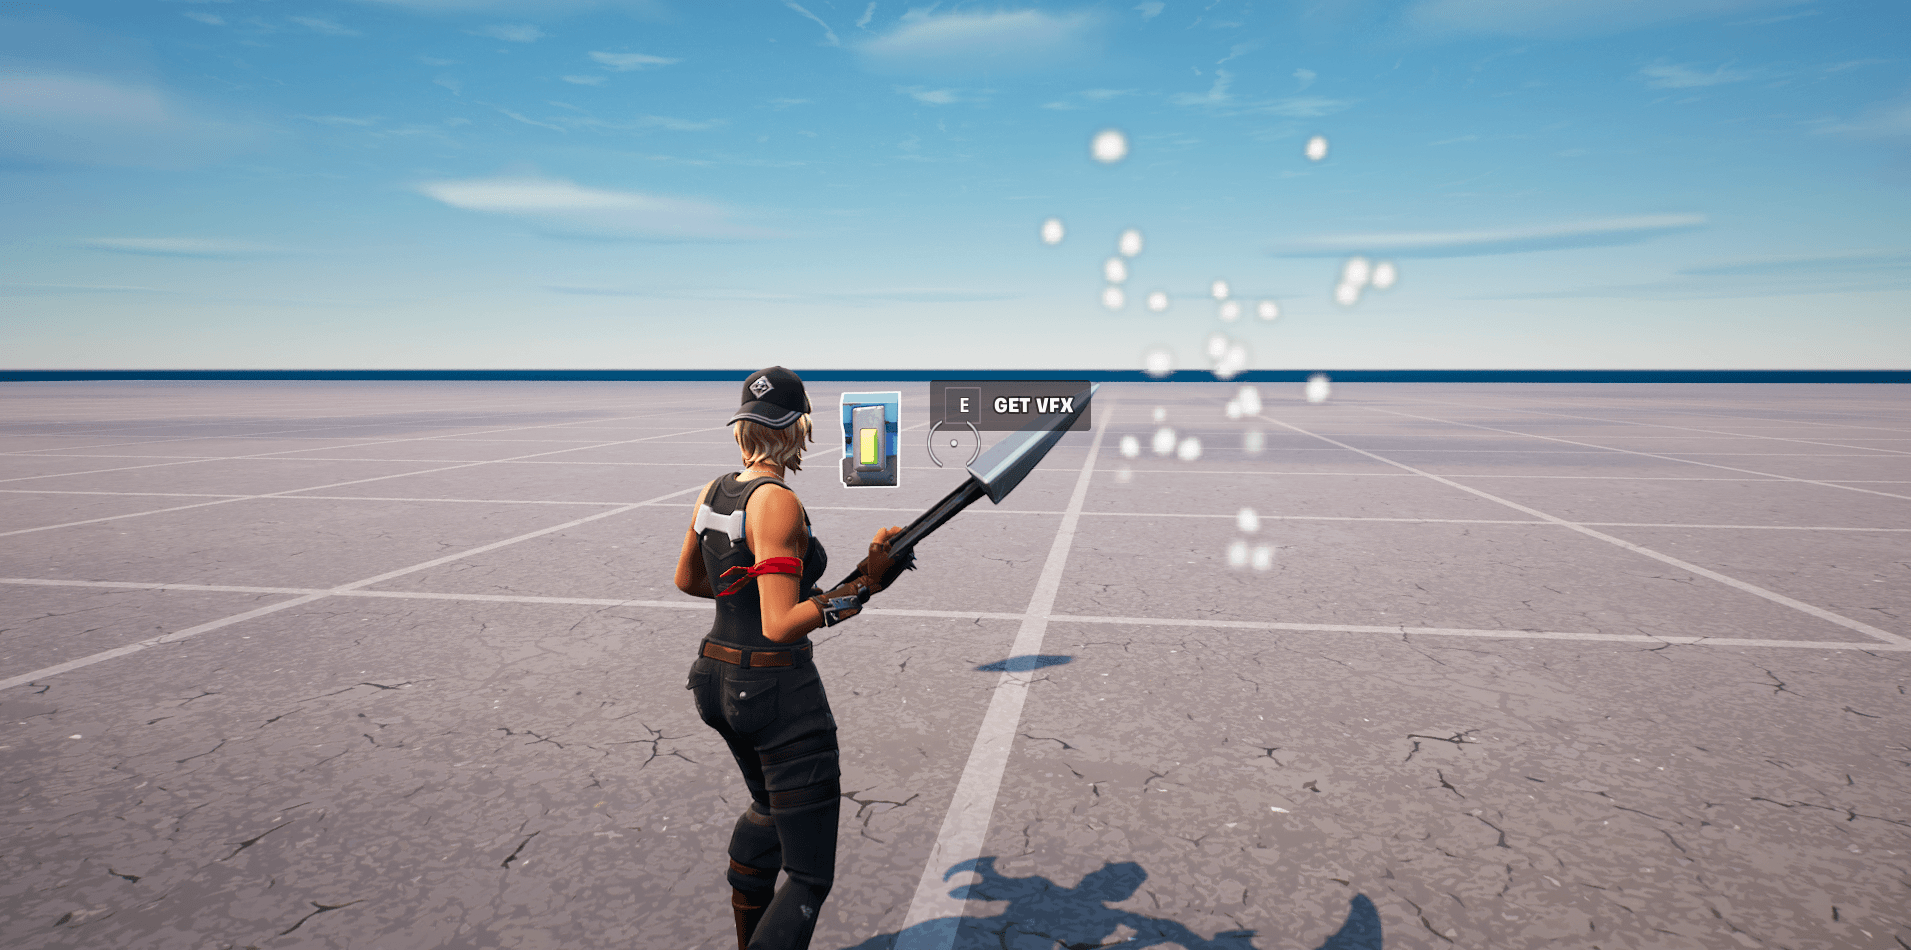
NEED A HANDS ON EXAMPLE?
If you need a visual example, check out my snippet posted in the Epic Developer Community! Feel free to copy it, and use it as a Verse learning tool! https://dev.epicgames.com/community/snippets/ekv/fortnite-vfx-toggle-device
I hope this tutorial helps! If it did, please let me know! Remember to never give up! And you got this!
Get help with UFEN in the FCHQ Discord

.
Comments
You must be logged in to comment.